Fudgy Peanut Butter Cake That Melts on Every Single Bite
Peanut butter in a cake does two things at once. It adds flavor and it adds fat, which means the crumb stays moist in a way that most cakes do not. I figured this out after my third attempt at a peanut butter cake that kept drying out, and the fix was simple: stop treating it like a vanilla cake with peanut butter added and start treating the peanut butter as a structural ingredient.
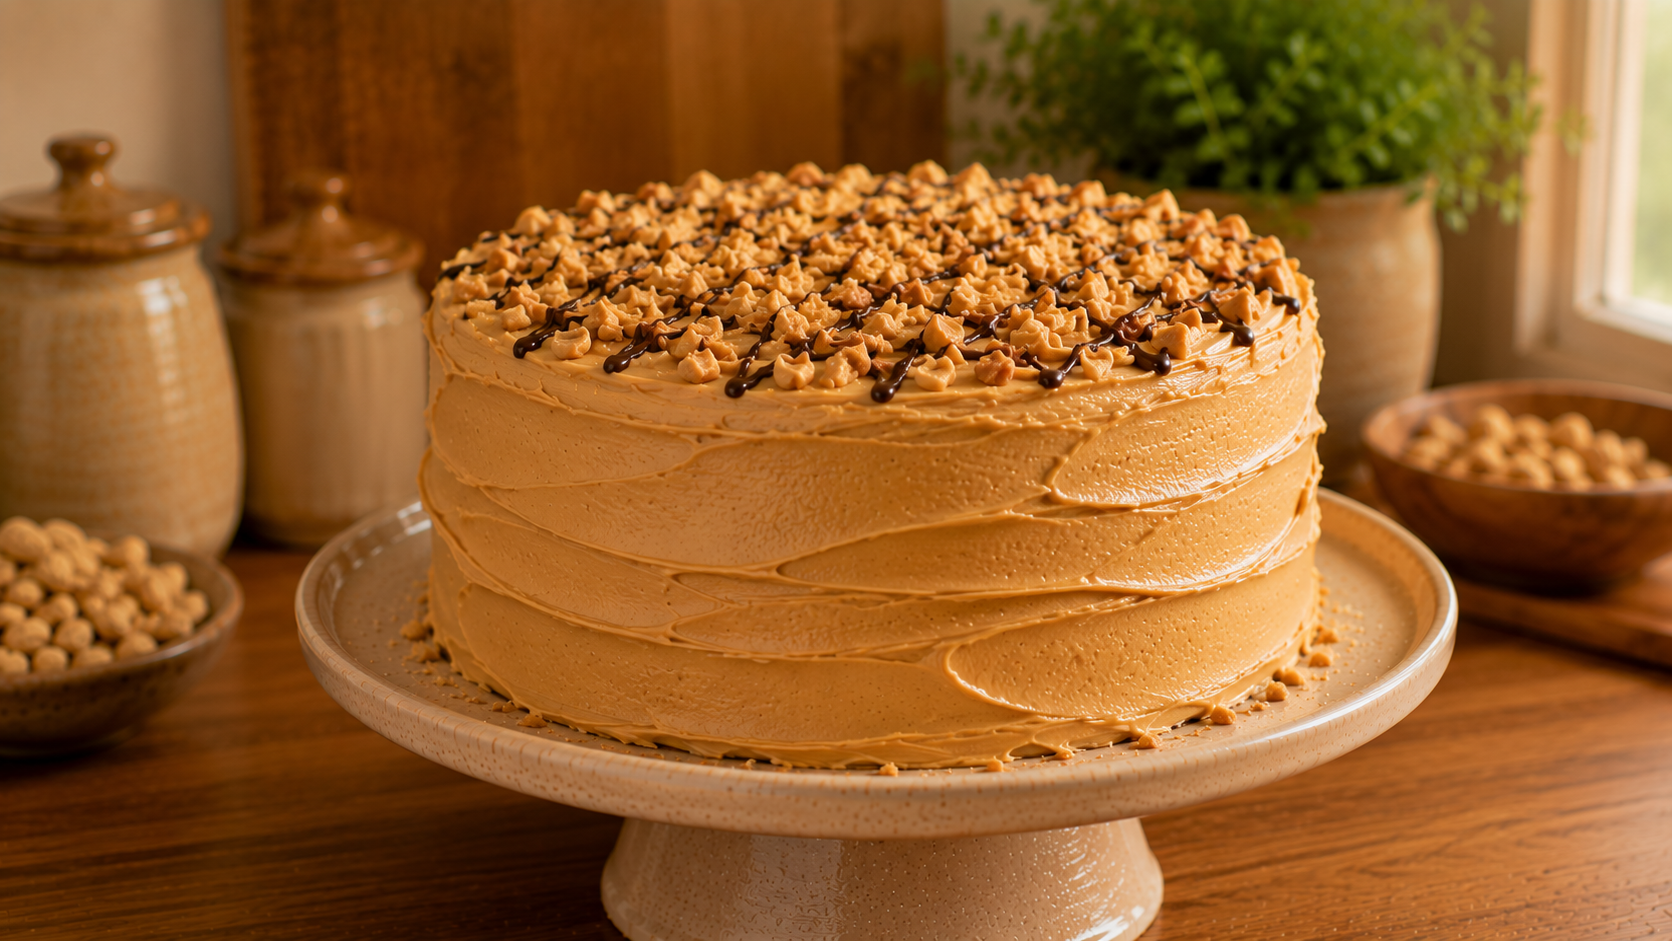
The frosting uses the same logic. No powdered sugar overload, no fuss, just peanut butter, butter, cream, and enough sweetness to make it feel like frosting rather than a spread. Bold, honest, and exactly what this cake deserves on top.
Why You Will Love This Recipe
• The peanut butter flavor is rich and pronounced without being overpowering, making every bite feel indulgent.
• The crumb is incredibly moist and tender thanks to the combination of oil, buttermilk, and creamy peanut butter.
• The peanut butter frosting is smooth, silky, and comes together in under ten minutes.
• This cake works beautifully for birthdays, casual gatherings, or simply when the craving strikes mid-week.
• You do not need a stand mixer or any special equipment to pull this off at home.
Ingredients
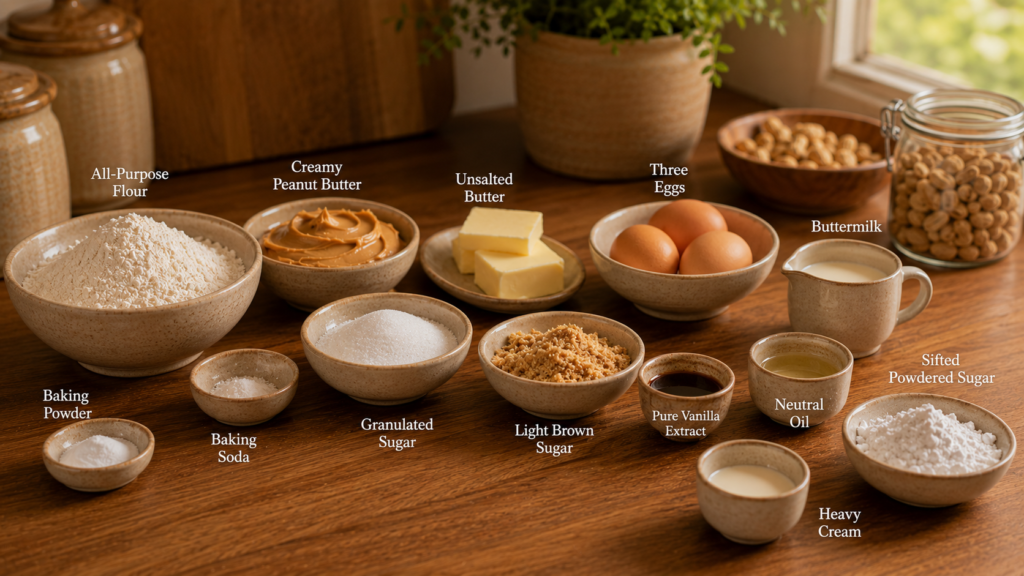
• 2 cups all-purpose flour, spooned and leveled
• 1 and 1/2 teaspoons baking powder
• 1/2 teaspoon baking soda
• 1/2 teaspoon fine salt
• 1 cup creamy peanut butter, at room temperature (not natural or runny style)
• 1/2 cup unsalted butter, softened
• 1 cup granulated sugar
• 1/2 cup light brown sugar, packed
• 3 large eggs, room temperature
• 2 teaspoons pure vanilla extract
• 1 cup buttermilk, room temperature
• 1/3 cup neutral oil (canola or vegetable)
For the Peanut Butter Frosting:
• 3/4 cup creamy peanut butter
• 1/2 cup unsalted butter, softened
• 2 cups powdered sugar, sifted
• 1/4 cup heavy cream
• 1 teaspoon vanilla extract
• Pinch of salt
Crockery and Time To Create
• Two 9-inch round cake pans or one 9×13-inch baking pan
• Two large mixing bowls
• Hand mixer or stand mixer
• Wire cooling rack
• Offset spatula for frosting
• Prep time: 20 minutes
• Bake time: 30 to 35 minutes
• Cooling and frosting: 45 minutes
• Total time: approximately 1 hour 40 minutes
• Serves: 12 to 16 slices
Ingredient Substitutions and Variations
• Buttermilk: Mix 1 cup whole milk with 1 tablespoon white vinegar and let sit for 5 minutes. It mimics the acidity and tenderness buttermilk brings.
• Creamy peanut butter: Almond butter works beautifully here and gives a slightly more delicate flavor while keeping the same moist texture.
• Neutral oil: Melted coconut oil (refined, not virgin) can be swapped in for a subtle richness without adding any coconut flavor.
• All-purpose flour: A 1:1 gluten-free flour blend works well for those avoiding gluten. The texture will be slightly denser but still very enjoyable.
• Granulated sugar: Coconut sugar can be used in equal amounts for a deeper, more caramel-like sweetness throughout the cake.
• Heavy cream in frosting: Whole milk or evaporated milk both work as a substitute and create a slightly lighter, less rich frosting.
Step-by-Step Instructions
Step 1: Prepare your oven and pans
Preheat your oven to 350F (175C). Grease two 9-inch round cake pans generously with butter, then dust lightly with flour or line the bottoms with parchment circles. Tap out any excess flour. This step matters because peanut butter cakes can stick more than a standard vanilla cake.
Step 2: Whisk the dry ingredients
In a large bowl, whisk together the flour, baking powder, baking soda, and salt until evenly combined. Set aside. Getting this done first keeps you moving quickly once the wet ingredients are ready.
Step 3: Beat peanut butter, butter, and sugars
In a separate large bowl, use a hand mixer on medium speed to beat the softened butter and peanut butter together for about 2 minutes until smooth. Add both sugars and continue beating for another 2 to 3 minutes. The mixture should lighten slightly in color and look creamy. This step builds the structure of your cake.
Step 4: Add eggs and vanilla
Add the eggs one at a time, beating well after each addition. Scrape down the sides of the bowl between additions. Add the vanilla extract and mix just until incorporated. The batter should look smooth, thick, and cohesive.
Step 5: Alternate dry and wet ingredients
With the mixer on low, add the flour mixture in three additions, alternating with the buttermilk and oil combined. Begin and end with the flour. Mix only until just combined after each addition. Overmixing here will develop gluten and tighten the crumb, so stop as soon as no dry streaks remain.

Step 6: Bake the cake
Divide the batter evenly between the two prepared pans and smooth the tops with a spatula. Bake for 30 to 35 minutes. The cake is done when a toothpick inserted into the center comes out with just a few moist crumbs, not wet batter. The edges will have pulled away slightly from the pan sides.
Step 7: Cool completely
Let the cakes cool in their pans on a wire rack for 15 minutes. Then invert them onto the rack and cool completely before frosting, at least 45 minutes. Frosting a warm cake will melt the butter in your frosting and you will lose all that beautiful texture.
Step 8: Make the frosting
Beat the softened butter and peanut butter together until fluffy, about 2 minutes. Add the sifted powdered sugar in two additions, mixing on low to avoid a cloud of sugar. Add the cream, vanilla, and salt, then beat on medium-high for 2 minutes until the frosting is smooth, creamy, and spreadable.
Step 9: Assemble and frost
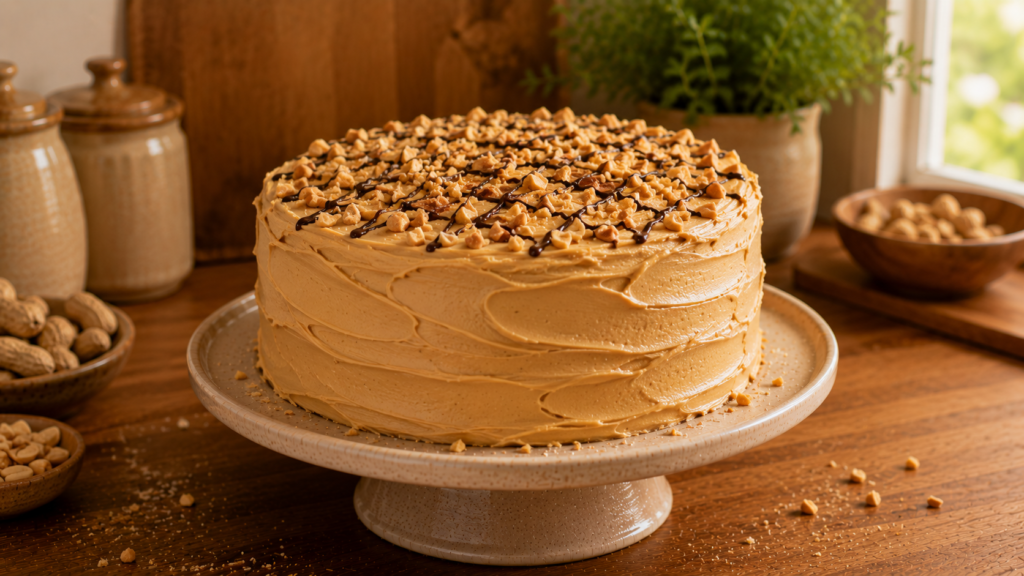
Place one cake layer on your serving plate. Spread a generous layer of frosting on top. Place the second layer carefully on top and frost the top and sides as desired. Use an offset spatula for clean, sweeping strokes. Garnish with crushed roasted peanuts or a drizzle of melted chocolate if you like.

Pro Tips for Best Results
• Always use commercial creamy peanut butter like Jif or Skippy rather than natural peanut butter, which separates and creates a greasy, uneven texture in baked goods.
• Room temperature eggs and buttermilk emulsify into the batter much more evenly, resulting in a more consistent and tender crumb.
• Weigh your flour if you can. Spooning and leveling is the next best option because scooping the cup directly packs in too much flour and dries out the cake.
• Sifting the powdered sugar before making the frosting prevents any lumps and gives you that perfectly silky finish every time.
• If the frosting feels too stiff, add heavy cream one tablespoon at a time. If it feels too loose, add a small amount of sifted powdered sugar.
Common Mistakes to Avoid
• Using cold butter or eggs: Cold dairy ingredients do not cream properly and result in a dense, uneven cake. Pull everything out of the fridge at least 30 minutes before starting.
• Overmixing after adding flour: Once the flour goes in, mix only until the streaks disappear. Overworked gluten makes cake tough and rubbery rather than tender.
• Not cooling fully before frosting: A warm cake melts buttercream almost instantly. Give it the full cooling time or even pop the layers in the fridge for 20 minutes before assembling.
• Skipping the pan prep: Peanut butter adds stickiness to a batter. Skipping the parchment or a proper grease-and-flour can mean a stuck or torn cake layer when you try to remove it.
What to Serve With
• Cold whole milk: A glass of cold whole milk is the most natural pairing here. It cuts through the richness of the peanut butter and resets the palate between bites.
• Vanilla ice cream: Vanilla ice cream served alongside a warm slice creates a beautiful contrast of temperatures and lets the nutty flavor of the cake shine against something clean and creamy.
• Dark chocolate ganache: A dark chocolate ganache drizzle on the plate takes this to another level entirely. Peanut butter and dark chocolate are one of the most classic flavor combinations in baking.

Storage and Reheating
• Room temperature: Frosted cake keeps well covered at room temperature for up to 2 days. Store it under a cake dome or wrap loosely with plastic wrap to prevent it from drying out.
• Refrigerator: Store in an airtight container or tightly wrapped for up to 5 days. Bring slices back to room temperature before serving for the best texture and flavor.
• Freezer: Unfrosted cake layers freeze beautifully for up to 2 months. Wrap each layer tightly in plastic wrap, then in foil. Thaw overnight in the refrigerator before frosting.
• Reheating: If you enjoy a warm slice, microwave individual pieces for 10 to 15 seconds. Do not overheat or the frosting will melt and the crumb will dry out.
Nutrition Information
Per serving (based on 14 slices):
| Nutrient | Per Serving |
| Calories | ~520 kcal |
| Total Fat | 30g |
| Carbohydrates | 57g |
| Sugar | 38g |
| Protein | 9g |
| Fiber | 2g |
| Note: Values are estimates based on standard ingredients and may vary depending on brands and portion sizes. | |
Health Benefits
Peanut butter is genuinely one of the more nutritious ingredients you can bake with. It delivers a meaningful dose of plant-based protein in each slice, along with healthy monounsaturated fats that support heart health. The magnesium and potassium content in peanuts also contribute to muscle function and energy metabolism.
Eggs add additional protein alongside fat-soluble vitamins like A and D, and they play a structural role that reduces the need for excess fat elsewhere in the recipe. When enjoyed in reasonable portions, this cake fits comfortably into a balanced diet rather than needing to be treated as an off-limits indulgence.
Conclusion
This peanut butter cake is the kind of recipe that earns a permanent spot in your rotation. It is deeply flavorful, forgiving for home bakers, and genuinely impressive to serve at any table. Whether you make it for a birthday, a weekend bake, or just because the craving got the better of you, I think you will be glad you did. Save this one, share it with someone you like, and do not skip the frosting.