Crimson Red Velvet Cake With Silky Cream Cheese Frosting
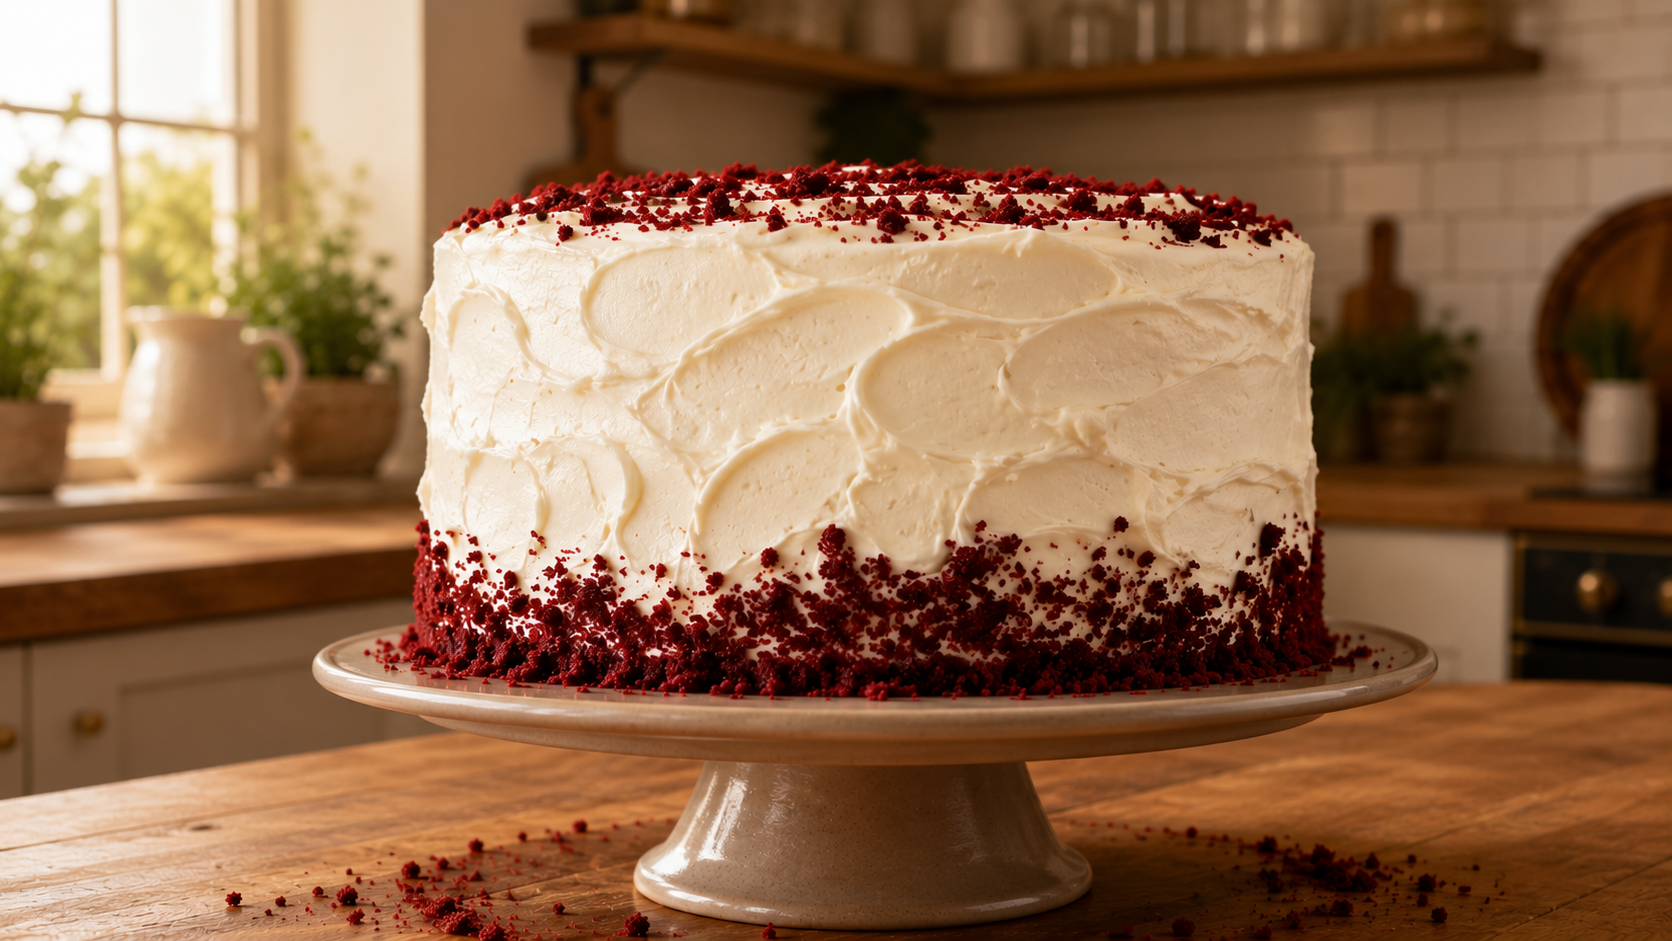
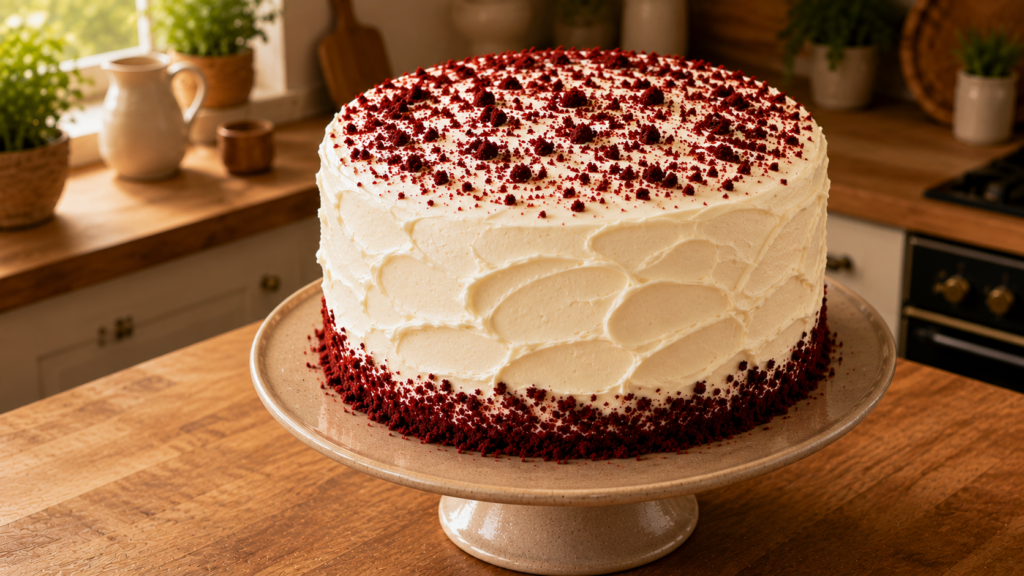
Red velvet cake has a reputation built almost entirely on appearance, and while that deep crimson crumb against white frosting is genuinely dramatic, the flavor has to back it up. Buttermilk and vinegar together create a tang that you feel rather than taste, and that faint cocoa undercurrent is what separates red velvet from a plain dyed vanilla cake.
The cream cheese frosting is non-negotiable here. Buttercream would make this too sweet and one-dimensional. The tang in the frosting mirrors the tang in the cake, and that conversation between layers is what makes every slice work.
Why You Will Love This Recipe
• The cake layers are incredibly moist with a soft, velvety crumb that holds together beautifully when sliced.
• The cream cheese frosting is rich and tangy without being overly sweet, balancing the cake perfectly.
• It is straightforward enough for a home baker but looks stunning on any table or celebration spread.
• The deep red color makes it one of the most visually dramatic cakes you can bake from scratch.
• It keeps well in the fridge for days, making it a great make-ahead option for parties or events.
Ingredients
For the Cake:
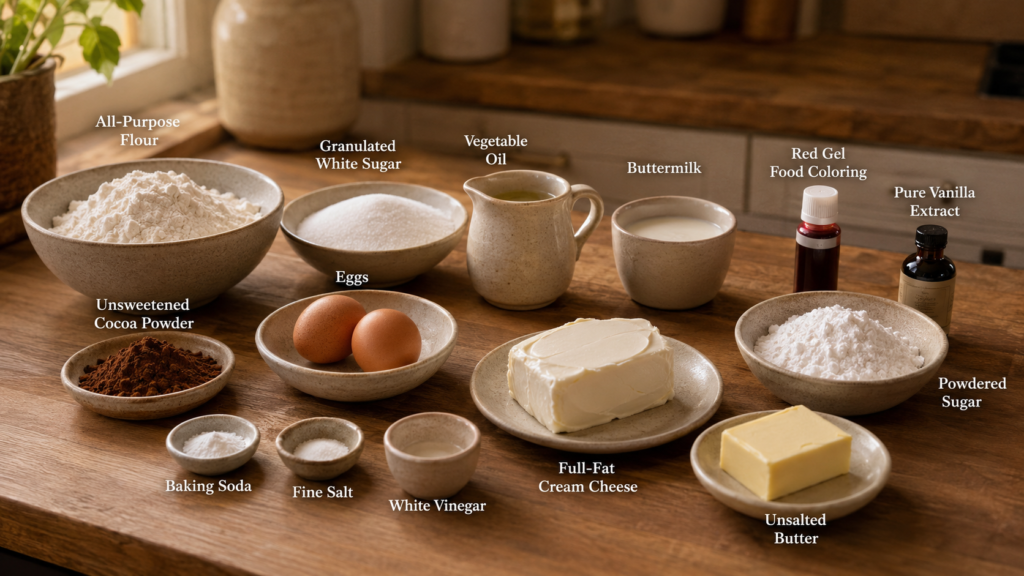
• 2 and 1/2 cups all-purpose flour
• 1 and 1/2 cups granulated white sugar
• 1 teaspoon baking soda
• 1 teaspoon fine salt
• 1 tablespoon unsweetened cocoa powder
• 2 large eggs, room temperature
• 1 and 1/2 cups neutral oil (vegetable or canola)
• 1 cup buttermilk, room temperature
• 2 tablespoons red food coloring (gel preferred)
• 1 teaspoon white vinegar
• 1 teaspoon pure vanilla extract
For the Cream Cheese Frosting:
• 450g full-fat cream cheese, softened
• 1/2 cup unsalted butter, softened
• 3 cups powdered sugar, sifted
• 1 teaspoon pure vanilla extract
• Pinch of fine salt
Crockery and Time To Create
• Two 9-inch round cake pans
• Mixing bowls (large and medium)
• Electric hand mixer or stand mixer
• Rubber spatula, wire cooling rack, offset spatula for frosting
• Sifter, measuring cups and spoons
• Prep time: 25 minutes
• Bake time: 28 to 32 minutes
• Cooling and assembly: 35 minutes
• Total time: approximately 1 hour 30 minutes
• Servings: 12 generous slices
Ingredient Substitutions and Variations
• Buttermilk: Mix 1 cup whole milk with 1 tablespoon white vinegar, let it sit for 5 minutes, and it works the same way.
• Gel food coloring: Liquid food coloring can be used but you may need more of it and it can thin the batter slightly, so gel is strongly preferred.
• Neutral oil: You can swap half the oil for unsalted melted butter for a slightly richer flavor and a bit more structure in the crumb.
• Cream cheese frosting: If you prefer a lighter frosting, a simple whipped vanilla buttercream works well, though it will be sweeter.
• All-purpose flour: Cake flour can be used instead for an even softer, more delicate crumb texture.
Step-by-Step Instructions
Step 1: Prep your pans and preheat the oven
Preheat your oven to 350F (175C). Grease two 9-inch round cake pans generously with butter or cooking spray, then line the bottoms with parchment paper and grease again. This ensures the layers release cleanly without any sticking.
Step 2: Mix the dry ingredients
In a large bowl, whisk together the flour, sugar, baking soda, salt, and cocoa powder until evenly combined. Sifting is not strictly required but I always sift the cocoa powder separately to break up any lumps before adding it.
Step 3: Mix the wet ingredients
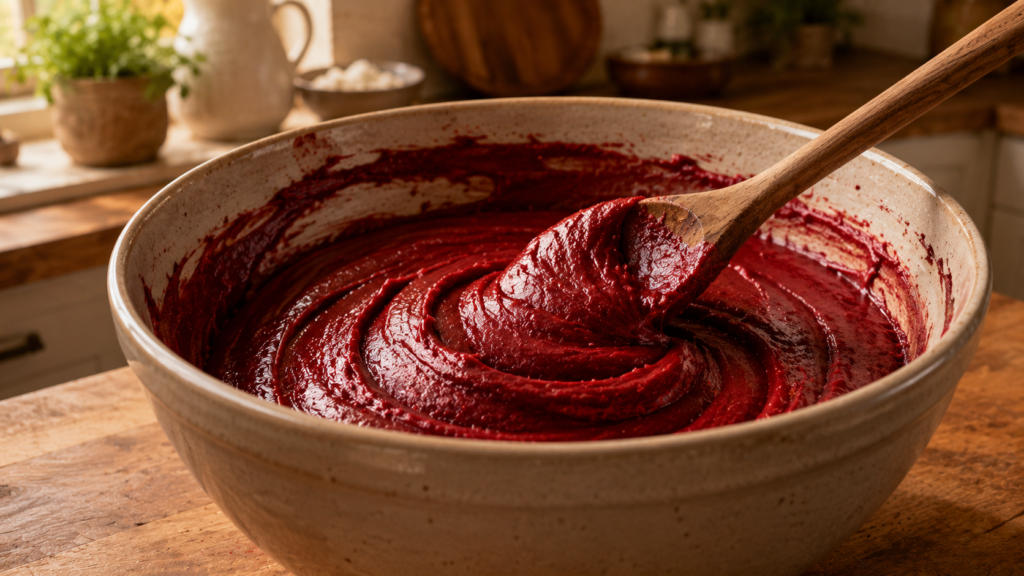
In a separate medium bowl, whisk the eggs, oil, buttermilk, food coloring, vinegar, and vanilla extract together until smooth. The mixture will be a vivid, slightly unsettling shade of red and that is exactly what you want.
Step 4: Combine wet and dry
Pour the wet ingredients into the dry and gently fold together using a rubber spatula or mix on low speed if using a mixer. Stop as soon as the batter is smooth and streak-free, about 45 seconds to 1 minute. Overmixing will tighten the gluten and make the cake dense.
Step 5: Bake the layers
Divide the batter evenly between your two prepared pans. Tap each pan on the counter twice to release air bubbles, then bake for 28 to 32 minutes. The cakes are done when a toothpick inserted in the center comes out clean and the edges have just started pulling away from the sides.
Step 6: Cool completely
Let the cakes cool in their pans on a wire rack for 15 minutes, then carefully turn them out and let them cool fully on the rack before frosting. Do not rush this step. Frosting a warm cake will cause the cream cheese frosting to slide and melt.
Step 7: Make the frosting
Beat the softened cream cheese and butter together on medium-high speed for 2 to 3 minutes until pale and fluffy. Add the sifted powdered sugar one cup at a time, beating on low after each addition. Add vanilla and a pinch of salt, then beat on medium for another minute until silky and smooth.
Step 8: Assemble and frost
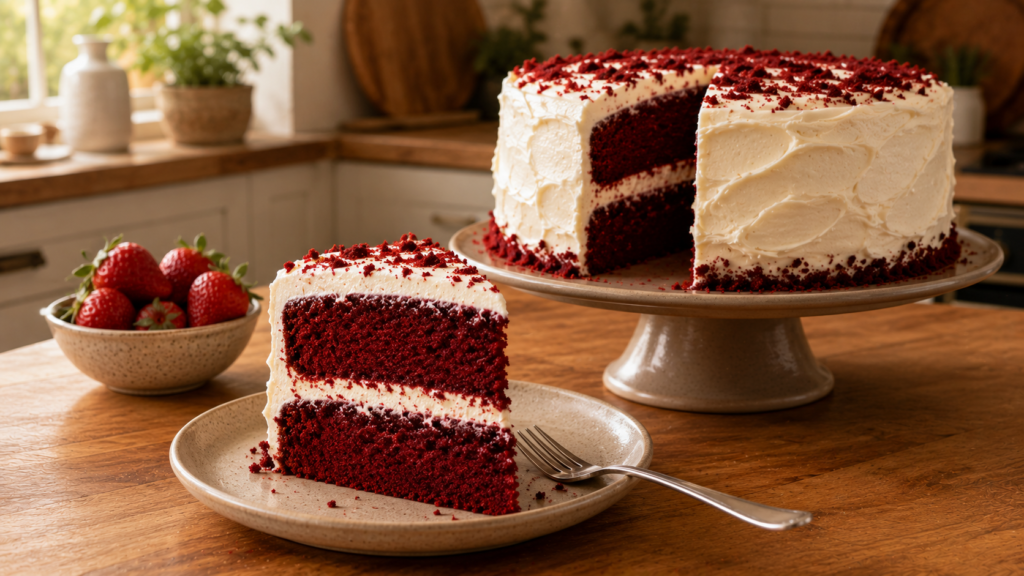
Place one cake layer on your serving plate or cake board. Spread a generous layer of frosting over the top using an offset spatula. Place the second layer on top and frost the top and sides of the entire cake. Finish with a smooth coat or swoops and swirls, whatever feels right to you.

Pro Tips for Best Results
• Bring all refrigerated ingredients to room temperature before starting, especially the eggs, buttermilk, cream cheese, and butter.
• Use gel food coloring rather than liquid for a more saturated, true red color without affecting the batter consistency.
• If your cream cheese frosting feels too soft to work with, refrigerate it for 20 minutes before spreading.
• Weighing your batter into each pan gives you even, level layers that do not need much trimming.
• Chilling the frosted cake for 30 minutes before slicing gives you clean, sharp cuts through the layers.
Common Mistakes to Avoid
• Overmixing the batter: This is the most common culprit behind a dense, tough red velvet cake. Mix only until just combined once the wet and dry come together.
• Skipping the vinegar: The vinegar reacts with the baking soda and helps the cake rise evenly while also sharpening the red color. Do not leave it out.
• Using cold cream cheese: Cold cream cheese does not blend smoothly and will leave lumps in your frosting no matter how long you beat it. Always bring it to room temperature first.
• Frosting a warm cake: Even slightly warm layers will cause the frosting to melt and slip. Always wait until the cakes are completely cool to the touch.
• Adding too much food coloring at once: Start with 1 tablespoon, assess the color, then add more if needed to avoid going overboard.
What to Serve With
• Fresh strawberries or raspberries: The tartness of fresh berries cuts through the richness of the cream cheese frosting beautifully and adds a lovely color contrast on the plate.
• Vanilla bean ice cream: A scoop alongside a slice of red velvet cake is a genuinely perfect combination, especially when the cake is slightly warm from the oven.
• Hot coffee or espresso: The slight bitterness of a good coffee balances the sweetness of the cake and makes every bite feel more intentional.
Storage and Reheating
• Room temperature: The frosted cake can sit at room temperature for up to 4 hours if your kitchen is not too warm, covered loosely.
• Refrigerator: Store covered in the fridge for up to 5 days. The cream cheese frosting makes refrigeration necessary.
• Freezer: Unfrosted cake layers can be wrapped tightly in plastic wrap and frozen for up to 2 months. Thaw overnight in the fridge before frosting.
• Reheating: Individual slices are best brought back to room temperature on the counter for about 20 minutes. Microwaving can dry out the crumb, so avoid it if possible.
Nutrition Information
Per serving (based on 12 slices):
| Nutrient | Per Serving |
| Calories | 520 kcal |
| Total Fat | 32g |
| Saturated Fat | 12g |
| Carbohydrates | 55g |
| Sugar | 40g |
| Protein | 5g |
| Sodium | 280mg |
| Note: Values are estimates based on standard ingredients and may vary depending on brands and portion sizes. | |
Health Benefits
Buttermilk, one of the key ingredients in this cake, is a fermented dairy product that is lower in fat than regular milk and contains probiotics that support gut health. It also contributes to a more tender crumb by breaking down gluten strands in the batter.
The cocoa powder used here, though small in quantity, contains flavonoids that have antioxidant properties. While this is certainly a treat and not a health food, the quality of ingredients you choose matters, and using real cocoa and natural dairy gives you a slightly more wholesome version than many store-bought alternatives.
Conclusion
This crimson red velvet cake has earned its place as one of the most requested recipes in my kitchen, and once you bake it you will understand why. The combination of that soft, faintly chocolatey crumb with the cool tang of cream cheese frosting is just undeniably good. I hope you bake it for someone you love, bookmark it for your next celebration, and share it with anyone who deserves a proper homemade cake.