Thick and Chewy Chocolate Chip Cookie Bars with Sea Salt
Spreading cookie dough into a pan rather than scooping it onto sheets changes how the interior bakes. The edges set first while the center stays insulated by the surrounding dough, which means the middle of a chocolate chip cookie bar finishes softer and chewier than a round cookie of the same recipe ever could. That protected center is the entire reason cookie bars exist and why they attract a different kind of devotion.
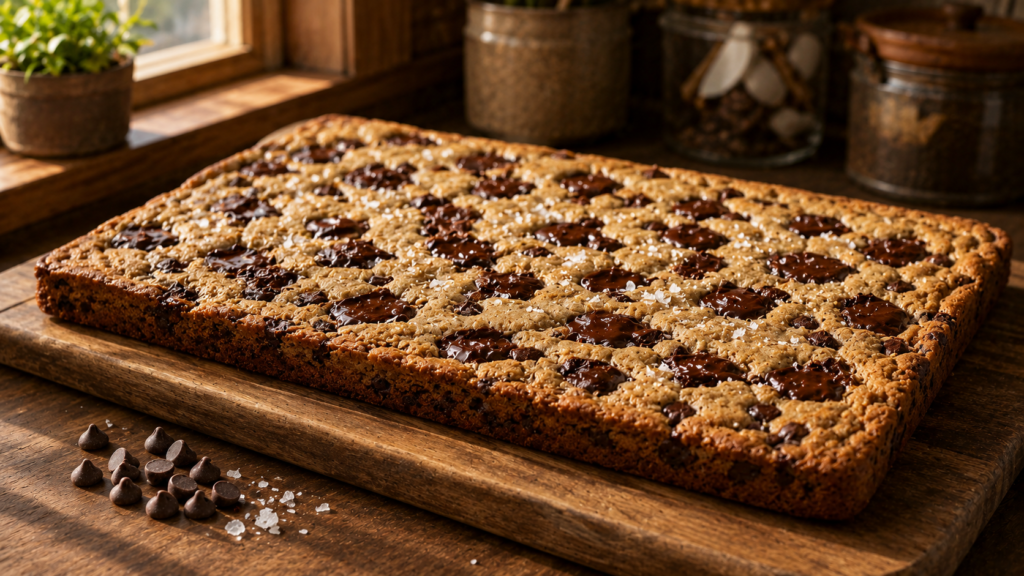
This version uses brown butter and a double hit of chocolate, chips folded in and chunks pressed on top, for the best possible result from a single 9×13 pan.
• Brown butter baked into the dough adds a deep, nutty, caramelized richness that makes these bars taste more developed and complex than any standard chocolate chip cookie recipe.
• The pan format means the center bakes to a fudgy, almost brownie-like chew that individual cookies simply cannot achieve because they lack the insulated core a full pan provides.
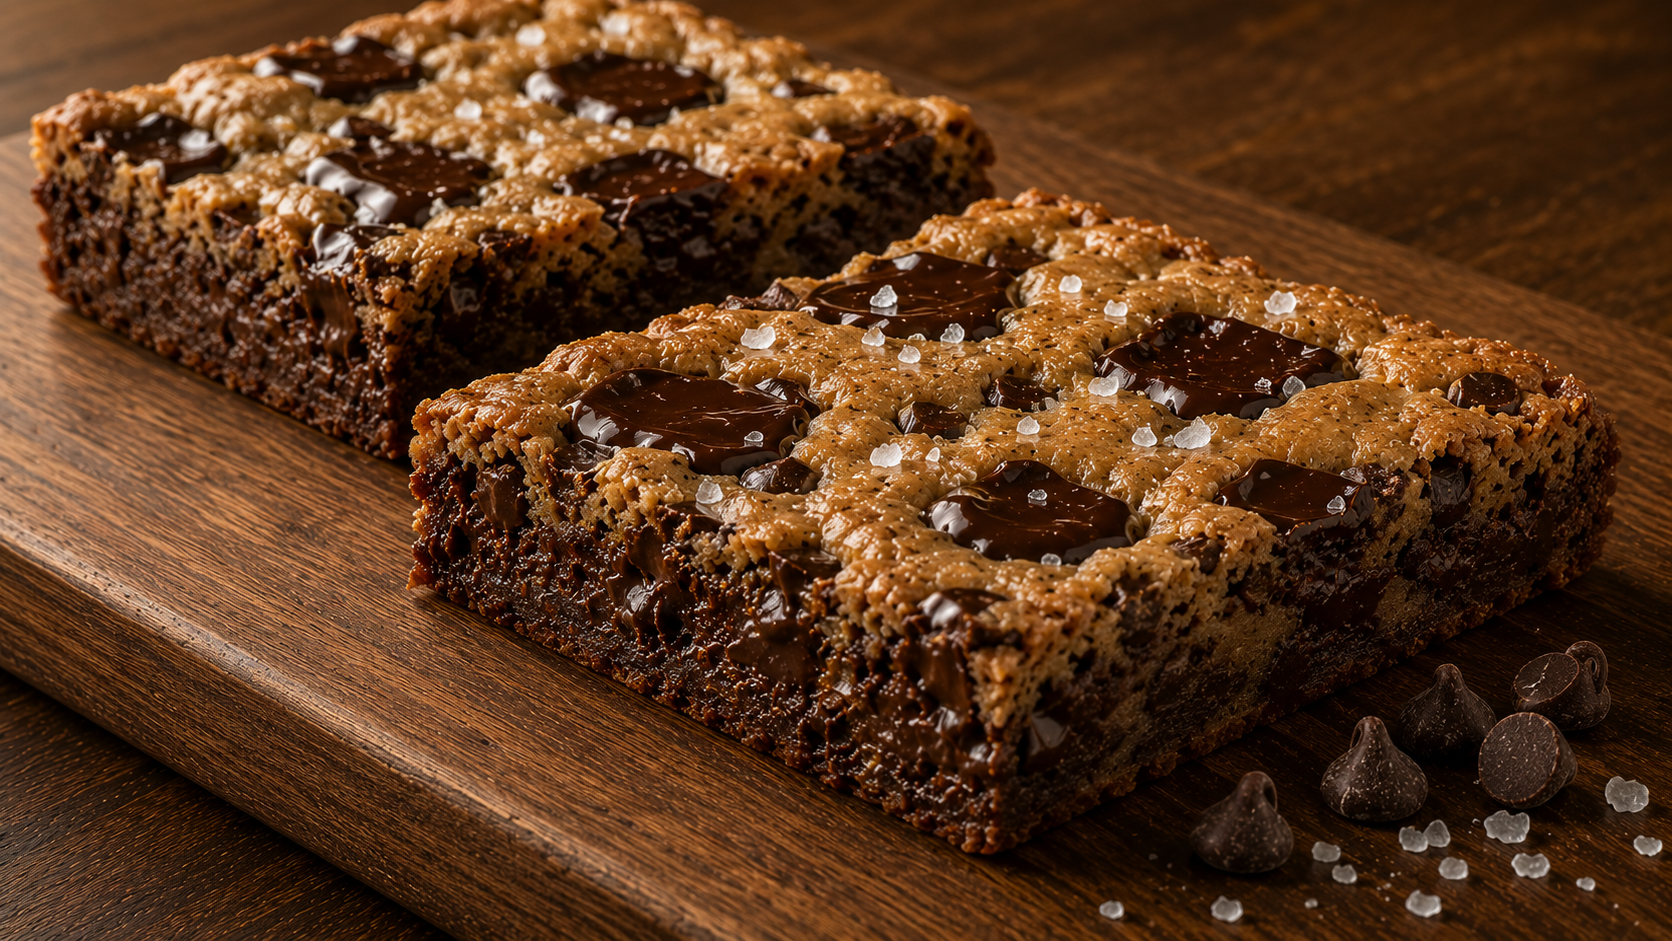
• Chocolate chips folded into the dough and extra chocolate chunks pressed onto the surface before baking create two distinct chocolate textures in every bar: melted pockets inside and glossy puddles on top.
• No scooping, no chilling, no multiple batches. One bowl of dough pressed into one pan produces 16 to 20 perfectly even bars in a single bake.
• A pinch of flaky sea salt scattered over the top before baking intensifies every other flavor in the bar and gives each bite a balanced, finished quality.
Ingredients
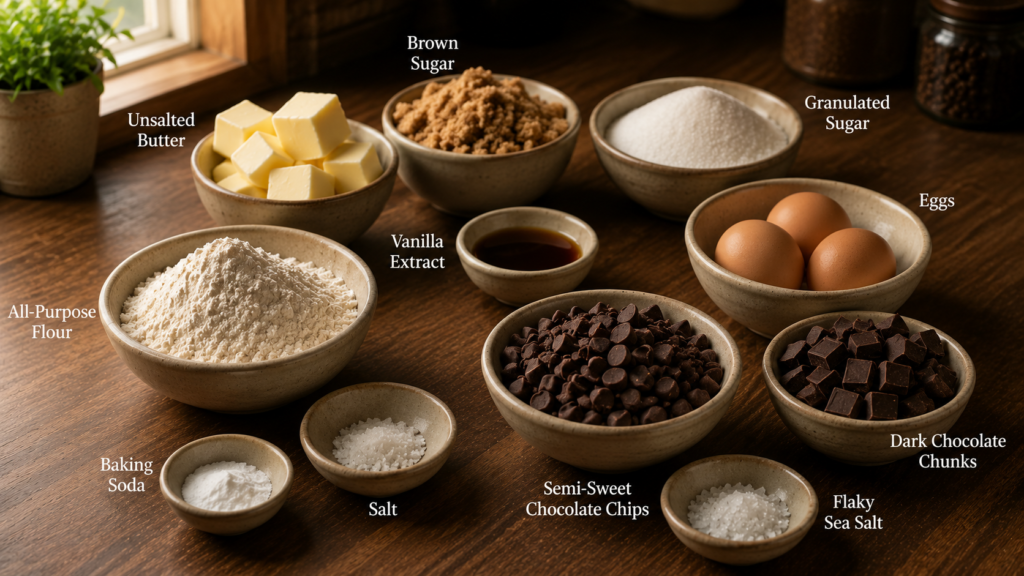
• 1 cup unsalted butter, browned and cooled to room temperature
• 1 cup light brown sugar, packed
• 1/2 cup granulated sugar
• 2 large eggs plus 1 egg yolk, room temperature
• 2 teaspoons vanilla extract
• 2 and 1/4 cups all-purpose flour
• 1 teaspoon baking soda
• 3/4 teaspoon salt
• 1 and 1/2 cups semi-sweet chocolate chips
• 1/2 cup dark chocolate chunks or roughly chopped dark chocolate bar (for topping)
• Flaky sea salt for finishing
Crockery and Time To Create
• Equipment: 9×13-inch baking pan, parchment paper, medium saucepan for browning butter, large mixing bowl, hand mixer or stand mixer, rubber spatula, offset spatula
• Prep time: 15 minutes
• Bake time: 22 to 25 minutes
• Cooling time: minimum 45 minutes before cutting
• Total time: approximately 1 hour 20 minutes
• Servings: 16 to 20 bars depending on cut size
Ingredient Substitutions and Variations
• Butter: Regular softened butter works but lacks the nutty depth that brown butter contributes. If skipping the browning step, increase the vanilla extract to 1 tablespoon to compensate for some of the lost complexity.
• Semi-sweet chocolate chips: Dark chocolate chips, milk chocolate chips, or a mix of both work in equal amounts. Peanut butter chips folded in alongside semi-sweet chocolate is a popular variation that works without any other adjustments.
• All-purpose flour: A 1:1 gluten-free flour blend substitutes directly. The bars are slightly more tender but slice cleanly once fully cooled.
• Extra egg yolk: The yolk adds richness and fat that keeps the center fudgy. Skipping it produces a slightly more cakey, less dense bar. It is a small addition with a noticeable effect.
• Flaky sea salt: Do not skip this. It is the one ingredient that makes the finished bars taste like they came from a bakery rather than a home kitchen. Maldon or any large-flake sea salt works.
Step-by-Step Instructions
Step 1: Preheat your oven to 350 degrees F (175 degrees C). Line a 9×13-inch baking pan with parchment paper, leaving an overhang on both long sides to use as handles when lifting the bars out. Lightly grease the parchment.
Step 2: Brown the butter in a medium light-colored saucepan over medium heat, swirling the pan regularly. After the butter melts and foams, it will go quiet and then the milk solids at the bottom will begin to turn golden. Continue cooking until the solids are a deep amber brown and the butter smells toasted and nutty, about 5 to 6 minutes. Pour immediately into a large mixing bowl and scrape in all the brown bits from the bottom of the pan as they carry most of the flavor. Cool for 15 to 20 minutes until the butter is back to a solid but soft consistency around the edges.
Step 3: Beat the cooled brown butter with both sugars on medium speed for 2 full minutes until the mixture lightens slightly and becomes fluffy. Add the two whole eggs and the egg yolk one at a time, beating briefly after each addition. Add the vanilla extract and beat for 30 seconds more until the batter is smooth, cohesive, and slightly glossy.
Step 4: Add the flour, baking soda, and salt to the bowl and mix on low speed until just combined with no dry streaks remaining. Do not overmix. Switch to a rubber spatula and fold in the chocolate chips by hand until evenly distributed throughout the dough.
Step; 5: Transfer the dough to the prepared pan and press it out in an even layer using your hands and then an offset spatula or the back of a spoon, working it all the way to the edges and corners. The dough will be thick. Scatter the dark chocolate chunks evenly over the top surface and press them in very gently so they sit half-embedded in the dough. Finish with a generous, even pinch of flaky sea salt over the entire surface.
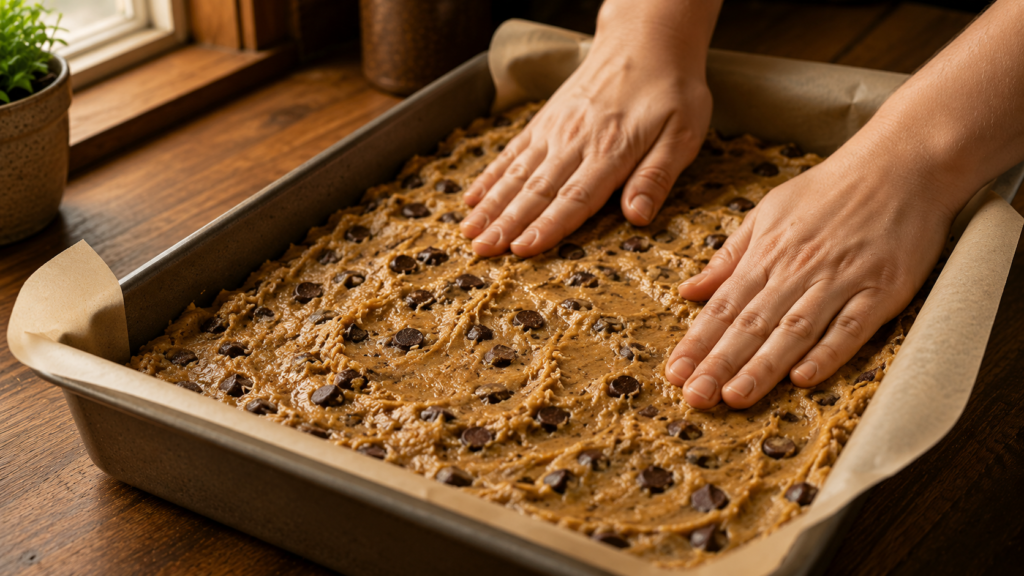
Step 6: Bake for 22 to 25 minutes until the edges are golden brown and set and the center looks just done with a very slight sheen remaining. The bars will look slightly underdone in the absolute center when you pull the pan. This is correct. They firm up significantly as they cool and an overbaked bar loses the fudgy center that makes this format worth choosing over individual cookies.
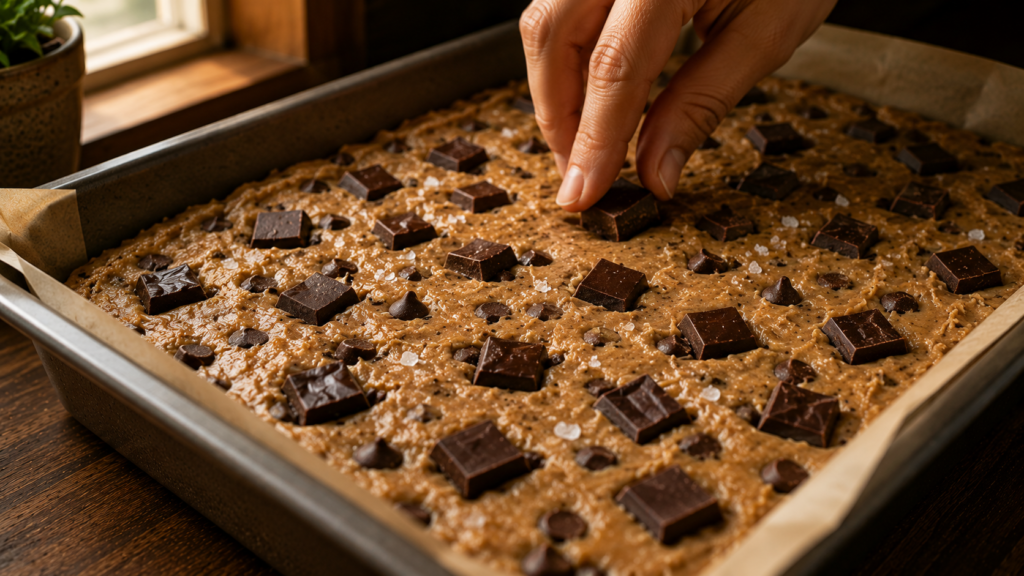
Step 7: Cool in the pan on a wire rack for at least 45 minutes before lifting out using the parchment overhang and cutting into bars. For the cleanest cuts, refrigerate the fully cooled slab for 20 minutes before slicing with a sharp knife.
Pro Tips for Best Results
• Scrape every brown bit from the bottom of the saucepan into the bowl; the toasted milk solids carry the concentrated nutty flavor and leaving them behind loses most of what browning the butter achieves.
• Cool the brown butter fully before beating with sugar; beating warm butter with sugar produces a greasy, separated mixture that never creams properly and leads to a flat, dense bar.
• Press the dough all the way into the corners of the pan so every bar bakes evenly. Thick dough in the center with thin edges causes uneven baking where the perimeter burns before the middle sets.
• Press the chocolate chunks in gently rather than pushing them deep into the dough; chunks sitting on the surface melt into glossy pools that look intentional and photograph beautifully.
• Wait the full 45 minutes before cutting; the center of a bar baked in a 9×13 pan retains heat long after the edges cool and slicing too early produces a soft, collapsing interior that firms into a clean bar if given enough time.
Common Mistakes to Avoid
• Overbaking: The most common mistake with cookie bars is pulling them when the center looks fully set and dry. At that point the center is already overdone and the bar will be cakey rather than fudgy once cooled. Pull the pan when the center still has a slight sheen and trust the carryover.
• Skipping the parchment overhang: Cookie bars baked without parchment or without the extended sides for handles must be cut inside the pan, which damages the edges of each bar and makes even portions impossible. The overhang is the only way to lift the slab cleanly.
• Using liquid brown butter: The butter must re-solidify to a soft, spreadable state before beating with sugar. Liquid butter in a cookie dough acts like oil and produces a greasy, flat result without any of the structure that creamed butter provides.
• Cutting before fully cooled: A warm center is still soft and fudge-like rather than set. Cutting into bars before the 45-minute rest produces pieces that fall apart at the center and leave a sticky mess on the knife.
• Under-seasoning: The flaky sea salt on top is not decorative. Without it the bars taste sweet and one-dimensional. Salt on the surface of a baked good makes every other flavor more distinct and more pronounced.
What to Serve With
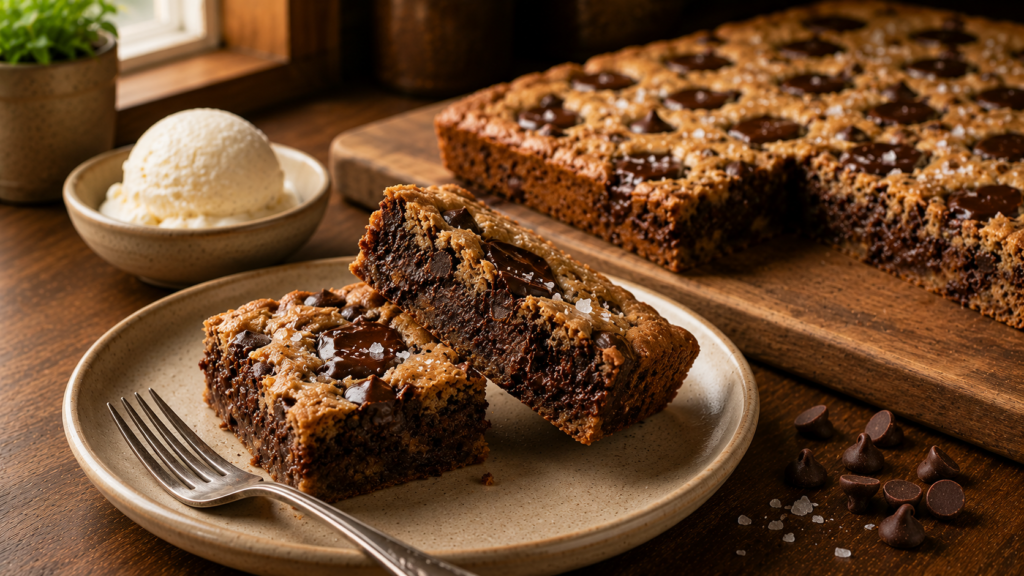
• A scoop of vanilla bean ice cream directly on top of a warm bar: The contrast of cold ice cream melting into the warm fudgy center and the dark chocolate chunks is the most satisfying way to serve these when fresh from the oven.
• Cold whole milk or an iced coffee: Both pair naturally with chocolate and cut through the richness of the brown butter dough without competing with the chocolate flavor.
• A drizzle of warm peanut butter thinned with a little neutral oil: Spooned over the top of individual bars just before serving, it adds a salty, nutty layer that pairs exceptionally well with dark chocolate and flaky sea salt.
Storage and Reheating
• Room temperature: Store in an airtight container in a single layer or with parchment between stacked layers for up to 4 days. The bars actually improve in chew and flavor on day two as the brown butter flavor deepens.
• Refrigerator: Store covered for up to 7 days. The bars firm considerably when cold and slice most cleanly straight from the refrigerator.
• Freezer: Freeze individual bars wrapped in plastic wrap, then placed in a freezer bag, for up to 3 months. Thaw at room temperature for 30 minutes or microwave for 20 seconds.
• Reheating: Microwave individual bars for 15 to 20 seconds to re-melt the chocolate chunks and restore some of the just-baked warmth without overcooking the interior.
Nutrition Information
| Nutrient | Per Serving |
| Calories | 275 kcal |
| Total Fat | 14g |
| Saturated Fat | 8g |
| Cholesterol | 55mg |
| Sodium | 175mg |
| Total Carbohydrates | 35g |
| Dietary Fiber | 1g |
| Sugars | 22g |
| Protein | 3g |
| * Percent daily values are based on a 2,000 calorie diet. Nutritional values are estimates only and may vary based on specific ingredients and portion sizes used. | |
Health Benefits
Dark chocolate contains flavanols, a group of antioxidant compounds that have been studied for their role in supporting cardiovascular health, improving blood flow, and reducing inflammation. The dark chocolate chunks on top of these bars contribute a meaningful amount of flavanols per serving, particularly if a high-cocoa-content bar is used. Choosing 70 percent cacao or above for the chunks maximizes this benefit.
Brown butter retains all the fat-soluble vitamins present in regular butter, including vitamins A, D, E, and K2, while the browning process converts some of the milk solids into compounds with antioxidant properties. It is still butter, and these are still cookie bars, but using quality dairy from grass-fed cows means each serving includes more of these nutrients than conventional butter would provide.
Conclusion
Chocolate chip cookie bars earn their place in the rotation by doing something individual cookies cannot do as reliably: guaranteeing a fudgy, soft center in every single portion without any guesswork about bake time or dough consistency from scoop to scoop. The brown butter, the double chocolate, and the flaky sea salt make this version worth keeping as a permanent recipe rather than a one-time experiment. Make it the next time you need to feed a crowd, bring something to share, or simply want the best version of a chocolate chip cookie in the format that suits it best.