Decadent Chocolate Tres Leches Cake Soaked to Perfection
The first time I made chocolate tres leches, I pulled it out of the fridge after its overnight soak and pressed a spoon lightly into the surface. The sponge pushed back with a soft, pillowy resistance that told me everything I needed to know. This is not a dry cake. This is a chocolate tres leches cake, and it drinks every drop of that three-milk mixture and holds it like a sponge.
What makes this version different from a vanilla tres leches is the cocoa depth in the sponge itself. The milk soak does not fight the chocolate; it deepens it, softening the crumb into something that sits right between a mousse and a cake.

Why You Will Love This Recipe
• The chocolate sponge soaks up three full milks and transforms into a dense, ultra-moist slice that holds together perfectly when cut.
• It requires no special equipment beyond a hand mixer, a baking dish, and patience while it chills overnight.
• The whipped cream topping adds a light, unsweetened contrast that balances the richness of the chocolate sponge beautifully.
• This cake is actually better the next day, which makes it ideal for preparing a full day before any gathering or celebration.
• Every bite delivers a different texture layer: airy sponge on top, gooey soaked middle, and a thick creamy base near the bottom of the slice.
Ingredients
For the Chocolate Sponge:
• 1 cup (120g) all-purpose flour
• 1/2 cup (50g) unsweetened cocoa powder
• 1 tsp baking powder
• 1/2 tsp baking soda
• 1/4 tsp salt
• 5 large eggs, separated
• 1 cup (200g) granulated sugar, divided
• 1/3 cup (80ml) whole milk
• 1 tsp vanilla extract
For the Three-Milk Soak:
• 1 can (14 oz / 396g) sweetened condensed milk
• 1 can (12 oz / 354ml) evaporated milk
• 1 cup (240ml) whole milk
• 2 tbsp unsweetened cocoa powder
For the Topping:
• 2 cups (480ml) heavy whipping cream
• 3 tbsp powdered sugar
• 1 tsp vanilla extract
• Cocoa powder for dusting
• Dark chocolate shavings for garnish

Crockery and Time To Create
Equipment needed: 9×13 inch baking dish, hand mixer or stand mixer, two large bowls, whisk, sifter, rubber spatula, toothpick for testing, and a skewer or fork for poking holes
Prep time: 25 minutes
Cook time: 30 minutes
Chilling time: Minimum 4 hours, ideally overnight
Servings: 12
Ingredient Substitutions and Variations
• Dutch-Process Cocoa: Replaces regular cocoa powder in the sponge for a darker, smoother chocolate flavor with less acidity.
• Coconut Milk: Replaces whole milk in the soak for a subtle tropical note that pairs beautifully with the chocolate.
• Half-and-Half: Replaces whole milk in the soak for a slightly lighter version without sacrificing creaminess.
• Mocha Variation: Add 1 tablespoon of instant espresso powder to the cocoa soak for a mocha tres leches with deeper flavor complexity.
• Kahlua Addition: Replace 2 tablespoons of whole milk in the soak with Kahlua for an adults-only chocolate coffee version.
• Dairy-Free Cream Topping: Replaces heavy cream with chilled full-fat coconut cream whipped to stiff peaks for a dairy-free topping option.
Step-by-Step Instructions
Step 1: Preheat and Prepare the Pan
Preheat your oven to 350°F (175°C). Grease a 9×13 inch baking dish lightly with butter and dust with cocoa powder, tapping out any excess. This prevents sticking and gives the outside of the sponge a light cocoa coating.
Step 2: Sift and Combine the Dry Ingredients
Sift together the flour, cocoa powder, baking powder, baking soda, and salt into a medium bowl. Set aside. Sifting is important here because cocoa powder clumps easily and an unsifted batter creates uneven pockets of dry cocoa in the finished sponge.
Step 3: Whip the Egg Whites
Separate the eggs carefully, placing whites in a large clean bowl and yolks in a separate bowl. Using a hand mixer on medium-high speed, beat the egg whites until foamy, about 2 minutes. Then gradually add half the sugar (100g) while continuing to beat until you reach stiff, glossy peaks, about 4 to 5 minutes more. The whites should hold their shape when you lift the beaters. Set aside.

Step 4: Beat the Yolks and Combine the Wet Base
In the bowl with the egg yolks, beat the remaining sugar on medium speed until the mixture is pale and ribbon-like, about 3 minutes. Add the vanilla extract and whole milk and whisk gently to combine. Fold the sifted dry ingredients into the yolk mixture in two additions, stirring just until no dry streaks remain. Do not overmix.
Step 5: Fold in the Egg Whites
Gently fold one-third of the whipped egg whites into the chocolate batter using a rubber spatula to lighten it. Then fold in the remaining whites in two additions using slow, wide strokes from the bottom of the bowl. Stop as soon as the batter looks uniform and airy. Overmixing deflates the whites and collapses the sponge structure that absorbs the soak later.
Step 6: Bake the Sponge
Pour the batter into the prepared baking dish and spread evenly. Bake at 350°F for 28 to 30 minutes until the sponge springs back when lightly pressed in the center and a toothpick inserted in the middle comes out clean. Remove from the oven and let it cool in the pan for 10 minutes.
Step 7: Poke and Prepare the Soak
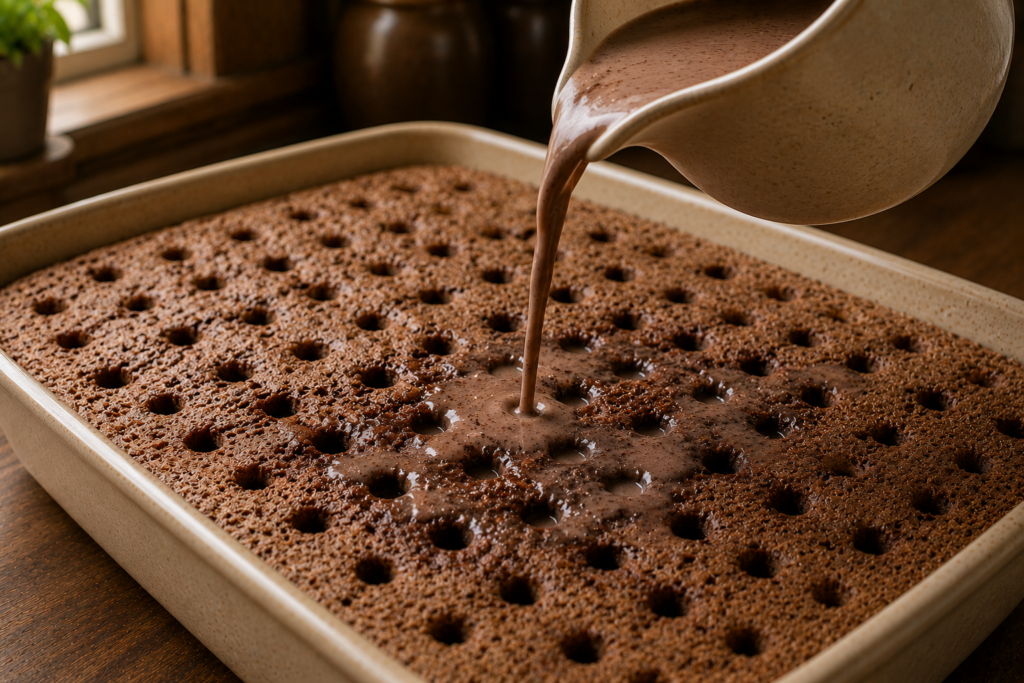
While the cake is still warm, use a skewer, fork, or chopstick to poke holes all over the surface, spacing them roughly every inch. Go deep, almost to the bottom of the cake. The more holes, the more soak the sponge will absorb. Whisk together the sweetened condensed milk, evaporated milk, whole milk, and 2 tablespoons of cocoa powder in a large measuring cup until the cocoa dissolves completely.
Step 8: Soak the Sponge
Pour the three-milk mixture slowly and evenly over the warm, hole-riddled sponge. Pour it in stages, pausing between pours to let each addition absorb before adding more. The milk will initially pool on the surface and slowly sink in. Once all the soak is in, cover the dish tightly with plastic wrap and refrigerate for at least 4 hours, but overnight is strongly preferred.
Step 9: Whip the Cream Topping
Just before serving, beat the cold heavy cream, powdered sugar, and vanilla together in a chilled bowl on medium-high speed until soft peaks form, about 3 minutes. Do not overbeat. Spread the whipped cream evenly over the chilled soaked cake in a generous, thick layer.
Step 10: Garnish and Serve
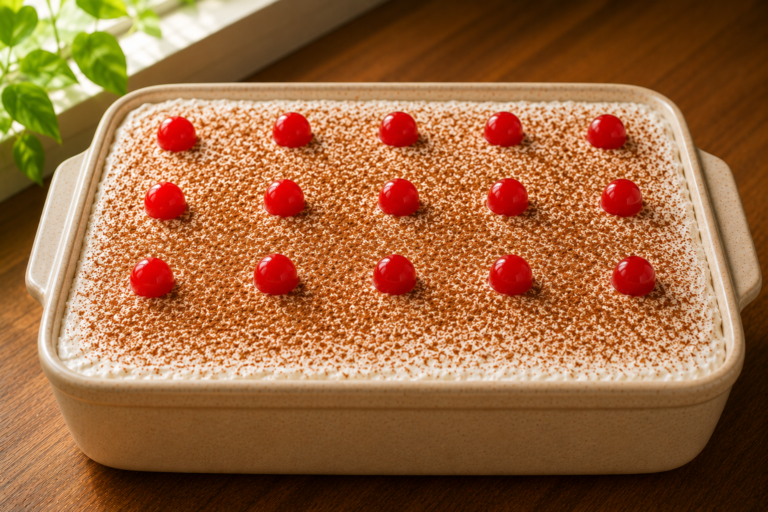
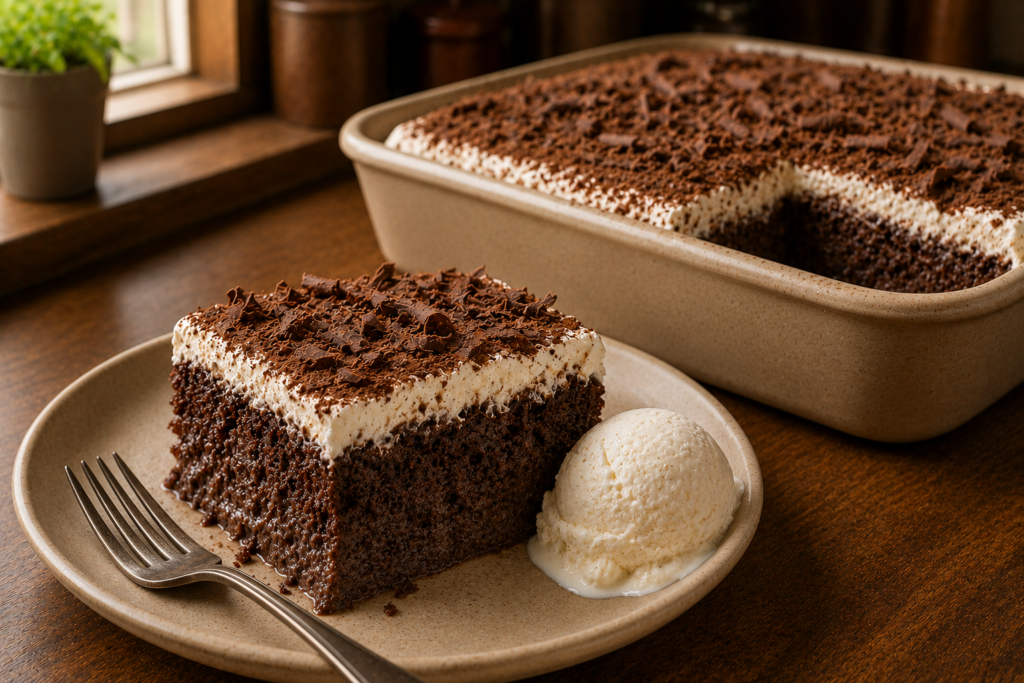
Dust the whipped cream surface lightly with unsweetened cocoa powder through a fine sieve. Scatter dark chocolate shavings across the top for texture and visual drama. Cut into squares and serve cold, directly from the dish.
Pro Tips for Best Results
• Make sure every trace of yolk is out of the bowl before whipping the whites, as even a small amount of fat prevents them from reaching stiff peaks.
• Poke the holes while the cake is still warm so the sponge is more open and absorbs the milk soak faster and more evenly.
• Dissolve the cocoa powder into the condensed milk first before adding the other milks so no lumps remain in the soak.
• The overnight rest is not optional if you want the best result; four hours is the bare minimum but 12 hours transforms the texture completely.
• Use cold heavy cream straight from the fridge and beat in a chilled bowl for the best whipped cream stability.
• Dust cocoa powder just before serving rather than ahead of time so it stays dry and does not bleed into the cream.
Common Mistakes to Avoid
• Deflating the egg whites: Fold gently with wide sweeping strokes and stop the moment the batter is uniform. Aggressive stirring collapses the air that gives the sponge its ability to absorb the soak without turning into mush.
• Pouring all the soak at once: Add the milk mixture in stages so the sponge has time to absorb each addition. Dumping it all at once floods the surface and the soak runs to the edges without penetrating the center evenly.
• Serving it too soon: A tres leches cake pulled after only one hour still has a wet, unabsorbed milk layer pooling at the base. The full chill time is what makes it creamy all the way through.
• Skipping the cocoa in the soak: Adding cocoa powder to the three-milk mix is what ties the soak flavor to the chocolate sponge and prevents the milks from tasting plain or diluting the chocolate flavor.
What to Serve With
• Fresh Strawberries: The acidity and brightness of strawberries cut through the richness of the chocolate milk soak and add a pop of color to each serving plate.
• Hot Espresso or Mexican Coffee: The bitterness of coffee plays directly against the sweet, milky cake and makes the chocolate flavor feel more sophisticated and layered.
• Vanilla Bean Ice Cream: A small scoop on the side adds temperature contrast and a neutral creaminess that lets the chocolate tres leches be the dominant flavor.
Storage and Reheating
• Fridge: Cover tightly with plastic wrap or a lid and refrigerate for up to 4 days. The cake actually continues to improve in texture through day two.
• Freezer: Freeze individual slices without the whipped cream topping, wrapped in plastic wrap and stored in a zip bag for up to 1 month. Thaw overnight in the fridge, then top with fresh whipped cream before serving.
• Reheating: This cake is meant to be served cold. Do not reheat. If serving from a very cold fridge in winter, let it sit at room temperature for 10 minutes before plating.
Nutrition Information
| Nutrient | Per Serving |
| Calories | 420 kcal |
| Total Fat | 18g |
| Saturated Fat | 10g |
| Carbohydrates | 58g |
| Sugar | 42g |
| Protein | 8g |
| Fiber | 2g |
| Sodium | 310mg |
| Nutritional values are estimates based on standard ingredients and may vary depending on brands used. Values calculated per 1 of 12 servings. | |
Health Benefits
Cocoa powder contains a concentrated dose of flavonoids, the plant compounds linked to improved circulation, reduced inflammation, and better mood regulation. Using real unsweetened cocoa in both the sponge and the milk soak means this cake delivers some genuine antioxidant value alongside its indulgence.
Eggs in this recipe contribute high-quality protein and essential B vitamins, while the milk soak adds meaningful amounts of calcium and vitamin D from three different dairy sources. In reasonable portions, this cake offers more nutritional substance than most standard desserts.
Conclusion
This chocolate tres leches cake is one of those recipes that rewards patience. The long soak, the overnight rest, the careful fold of the egg whites: every step pays off in the final slice. Make it the night before, keep it cold, top it fresh, and share it with people who appreciate a cake that takes its time. Save this one, come back to it for celebrations, and let me know how it turns out.