Buttery Fork-Pressed Peanut Butter Cookies with Golden Crackled Edges
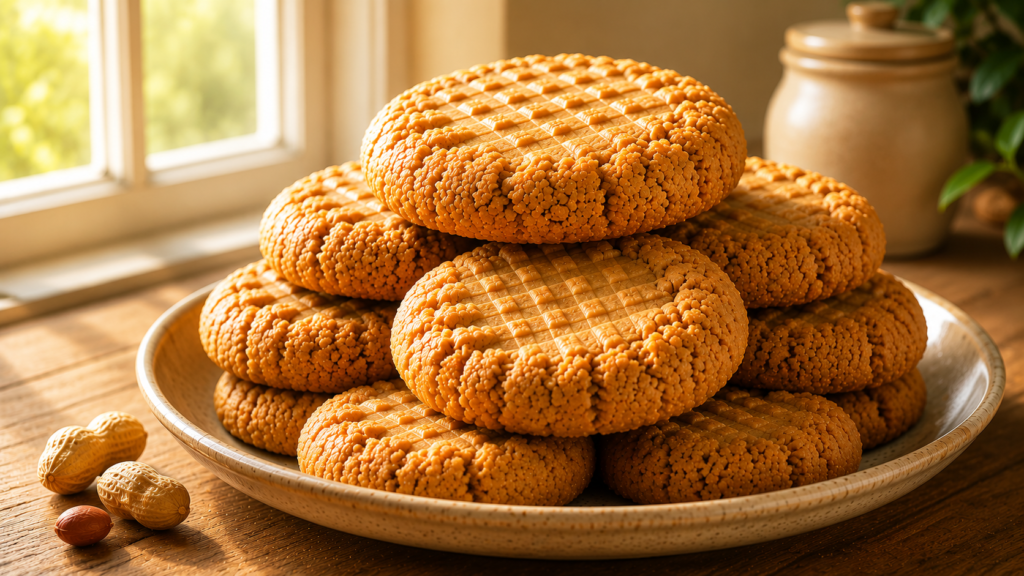
Peanut butter dough behaves differently than regular cookie dough, it holds its shape stubbornly and barely spreads, which is exactly what gives these cookies their signature thick, bakery-style height.
Press the fork pattern firmly enough and the edges crackle into deep golden ridges while the center stays soft and dense.
Why You Will Love This Recipe
- Rich, nutty peanut butter flavor in every bite without any artificial aftertaste.
- Thick, bakery-style cookies with crackled golden edges and a soft, dense center.
- Just one bowl and basic pantry staples, no fancy equipment required.
- Dough comes together in fifteen minutes, ideal for last minute cravings or bake sales.
- Freezer friendly dough means fresh cookies are always within reach.
Ingredients
- 1 cup creamy peanut butter, the no-stir shelf stable kind works best
- 1/2 cup unsalted butter, softened to room temperature
- 1/2 cup granulated sugar, plus 1/4 cup extra for rolling
- 1/2 cup packed light brown sugar
- 1 large egg, room temperature
- 1 teaspoon pure vanilla extract
- 1 1/4 cups all-purpose flour, spooned and leveled
- 1 teaspoon baking soda
- 1/2 teaspoon baking powder
- 1/4 teaspoon fine sea salt

Crockery and Time To Create
You will need a large mixing bowl, an electric hand or stand mixer, a baking sheet lined with parchment paper, and a standard dinner fork for the signature crisscross pattern.
Total time: 35 minutes (15 minutes prep, 12 minutes bake, remaining for cooling). Yields 24 cookies.
Ingredient Substitutions and Variations
- Natural peanut butter: can replace creamy peanut butter, but chill the dough for 30 minutes first since natural varieties are softer and oilier.
- Crunchy peanut butter: replaces creamy peanut butter and adds extra texture from real peanut bits throughout.
- Coconut sugar: replaces brown sugar for a deeper, slightly caramelized flavor.
- Gluten-free flour blend: replaces all-purpose flour and keeps the same chewy texture when measured cup for cup.
- Mini chocolate chips: fold in a half cup to turn this into a peanut butter chocolate chip variation.
Step-by-Step Instructions
Step 1: Cream the butter and sugars. Beat the softened butter, granulated sugar, and brown sugar together for about 2 minutes until light and fluffy with a pale color.
Step 2: Add the wet ingredients. Mix in the peanut butter, egg, and vanilla extract until the batter looks smooth and fully combined, scraping down the bowl once.
Step 3: Combine the dry ingredients. Whisk the flour, baking soda, baking powder, and salt in a separate bowl, then fold into the wet mixture just until no streaks of flour remain.
Step 4: Shape and coat the dough. Roll the dough into 1.5 tablespoon balls, then roll each ball in the reserved granulated sugar until evenly coated.

Step 5: Press the signature pattern. Place the balls 2 inches apart on the lined baking sheet and press each one twice with a fork in a crisscross pattern, flattening slightly to about half an inch thick.

Step 6: Bake until set. Bake at 350°F for 10 to 12 minutes, until the edges look set and lightly golden while the centers still appear slightly underbaked.
Step 7: Cool completely. Let the cookies rest on the baking sheet for 5 minutes, then transfer to a wire rack. They will firm up as they cool, so resist moving them too early.
Pro Tips for Best Results
- Chill the dough for 20 minutes if your kitchen is warm, since soft dough spreads too thin while baking.
- Use a kitchen scale for the flour if you have one, since scooping straight from the bag often packs in extra flour.
- Pull the cookies out when the centers still look slightly soft, they continue cooking on the hot baking sheet.
- Press the fork pattern gently so the cookie keeps height instead of spreading too wide.
Common Mistakes to Avoid
- Overbaking the cookies: pull them at 10 to 11 minutes for the chewiest texture, since they firm up significantly as they cool.
- Using cold butter: cold butter will not cream properly, so let it sit out for at least 30 minutes before starting.
- Skipping the sugar coating: rolling in sugar creates the signature crackled top, so do not skip this step even when short on time.
- Overmixing the dough: stop mixing as soon as the flour disappears to avoid tough, dense cookies.
What to Serve With
- Cold glass of milk: the classic pairing that balances the rich peanut butter flavor.
- Vanilla bean ice cream: makes an easy cookie sandwich for warm afternoons.
- Hot coffee or chai: the warm spice and bitterness cut through the cookie’s sweetness nicely.
Storage and Reheating
- Fridge: store in an airtight container at room temperature for up to 5 days, no refrigeration needed.
- Freezer: freeze baked cookies in a sealed bag for up to 3 months, or freeze unbaked dough balls for up to 2 months.
- Reheating: warm frozen cookies in a 300°F oven for 5 minutes, or microwave a single cookie for 10 seconds for that fresh baked softness.
Nutrition Information
| Nutrient | Per Serving |
| Calories | 142 kcal |
| Total Fat | 8g |
| Saturated Fat | 3g |
| Carbohydrates | 15g |
| Sugars | 10g |
| Protein | 4g |
| Sodium | 98mg |
| Fiber | 1g |
Nutrition values are estimates calculated using standard ingredient data and may vary based on exact brands and portion sizes used.
(Note: for the actual WordPress post, this should go in as the four-sided-border HTML table with #f5f0eb header and #faf7f4 alternating rows, per your rule, not a plain markdown table — happy to generate that HTML separately if useful.)
Health Benefits
Peanut butter brings plant based protein and healthy monounsaturated fats to this cookie, which helps keep you fuller longer compared to many other sweet treats.
Enjoyed in moderation, these cookies also provide small amounts of magnesium and vitamin E from the peanuts, nutrients that support muscle and skin health.
Conclusion
There is nothing fancy about this recipe, and that is exactly why it works. Mix, roll, press, and bake, and you end up with a cookie that has real height, crackled edges, and a soft center every time. Give it a try this weekend, save the recipe for later, and let me know how your crisscross pattern turns out.