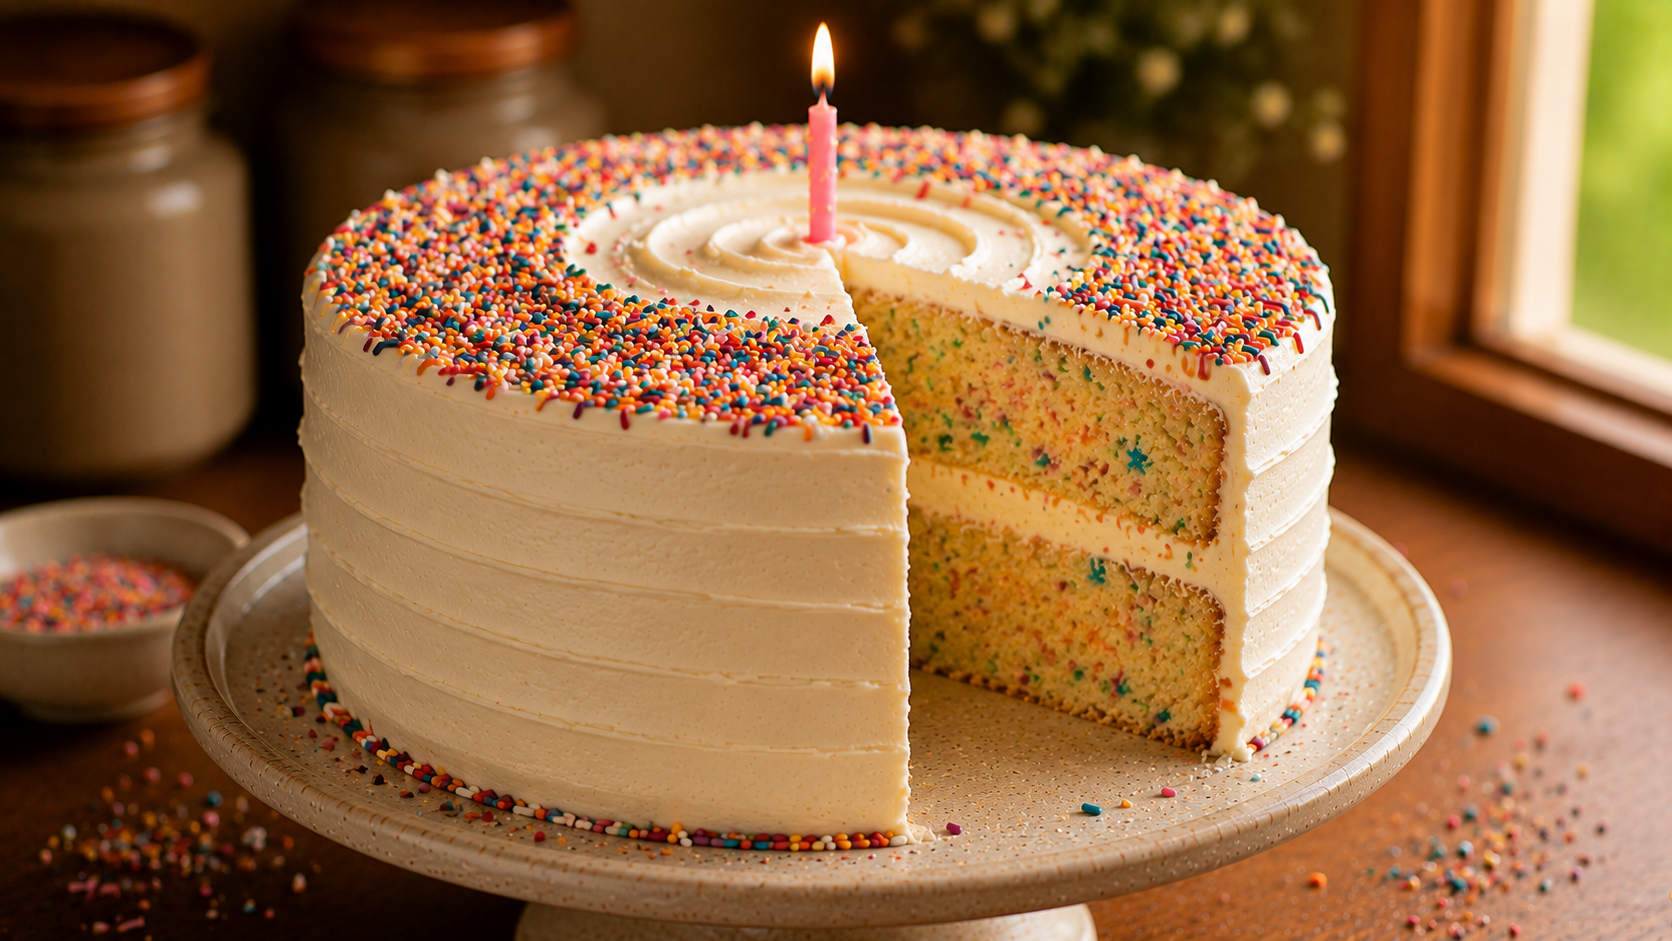
Festive Funfetti Cake Bursting With Rainbow Sprinkle Joy
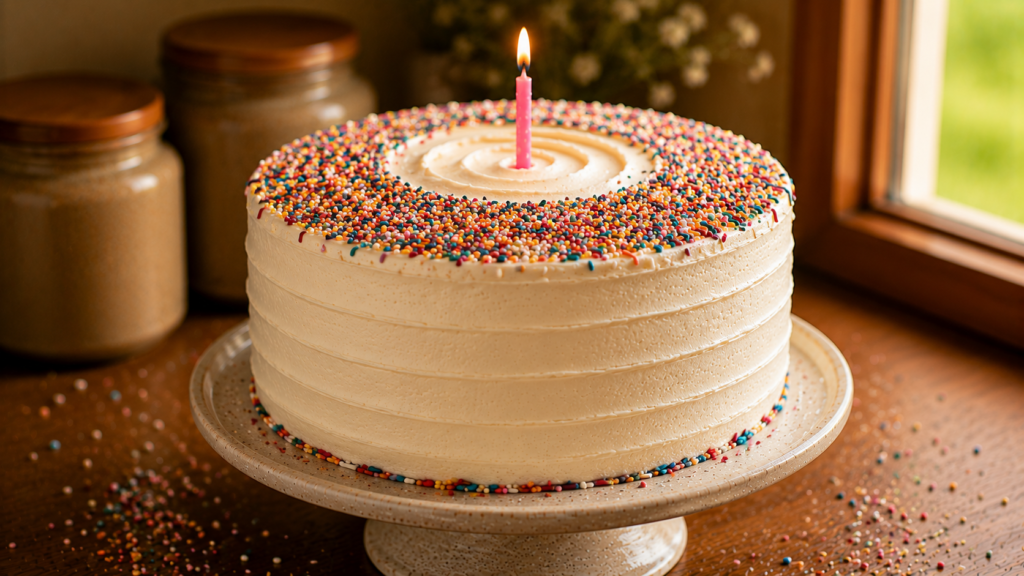
I baked my first funfetti cake from a box mix at age nine, and I have spent a good portion of my adult life trying to recreate that exact feeling in a scratch version. This is the one that got there. The crumb is soft and buttery, the vanilla is deep and real, and those rainbow jimmies stay bright and distinct instead of bleeding into the batter.
It does not need a birthday or an occasion to justify it. Sprinkles in a cake batter are reason enough on their own, and I will stand by that every single time.
Why You Will Love This Recipe
- It has an incredibly tender, moist crumb that stays soft for days thanks to buttermilk and real butter working together to keep every bite pillowy and light.
- The vanilla flavor is deep and genuine because I use both pure vanilla extract and a touch of almond extract, giving this cake its signature bakery-style aroma that fills your kitchen beautifully.
- Those rainbow sprinkles stay vibrant and colorful inside the batter without bleeding color, making every slice a visual celebration that looks as joyful as it tastes.
- The fluffy vanilla buttercream frosting is silky smooth, not overly sweet, and pipes beautifully whether you are going for a rustic swirl or an elegant layered look for a party.
- This recipe is completely beginner-friendly and does not require any fancy equipment. A hand mixer, two round cake pans, and a love for sprinkles is all you need to pull this off.
Ingredients
For the Cake
- 2 and 1/2 cups (315g) all-purpose flour, spooned and leveled
- 2 and 1/4 teaspoons baking powder
- 1/2 teaspoon baking soda
- 1/2 teaspoon fine sea salt
- 1 cup (226g) unsalted butter, softened to room temperature
- 1 and 3/4 cups (350g) granulated white sugar
- 4 large eggs, room temperature
- 2 teaspoons pure vanilla extract
- 1/4 teaspoon almond extract
- 1 cup (240ml) full-fat buttermilk, room temperature
- 2/3 cup (110g) rainbow jimmies sprinkles (not nonpareils)
For the Vanilla Buttercream Frosting
- 1 and 1/2 cups (340g) unsalted butter, softened
- 5 cups (600g) powdered sugar, sifted
- 3 to 4 tablespoons heavy cream
- 2 teaspoons pure vanilla extract
- Pinch of fine sea salt
- Extra rainbow sprinkles for decorating

Crockery and Time To Create
Equipment Needed
- Two 9-inch round cake pans
- Stand mixer or hand electric mixer
- Large mixing bowls
- Rubber spatula
- Wire cooling rack
- Offset spatula for frosting
- Parchment paper
Timing and Serving
- Prep Time: 25 minutes
- Cook Time: 30 minutes
- Cooling Time: 1 hour
- Total Time: Approximately 2 hours
- Servings: 12 slices
Ingredient Substitutions and Variations
- No buttermilk: Combine 1 cup of whole milk with 1 tablespoon of white vinegar or fresh lemon juice, stir, and let it sit for 5 minutes. It thickens into a perfect stand-in that gives the same tender crumb.
- Dairy-free version: Swap butter for vegan butter sticks and the buttermilk for full-fat oat milk with a splash of apple cider vinegar. The texture stays wonderfully soft and the sprinkles still pop with color.
- Gluten-free flour: Use a 1:1 gluten-free all-purpose flour blend and let the batter rest for 10 minutes before baking so the flour can fully hydrate. Results are surprisingly close to the original.
- Sheet cake format: Pour the batter into a greased 9×13 inch baking pan and bake at 350 degrees Fahrenheit for 35 to 40 minutes. Just as beautiful and even easier to frost and serve for a crowd.
- Almond extract: Skip it entirely if you have nut sensitivities in your household. Just increase the vanilla extract to 2 and 1/2 teaspoons and the cake will still taste wonderfully fragrant and classic.
Step-by-Step Instructions
Step 1: Prep Your Pans and Preheat the Oven (5 minutes)
Preheat your oven to 350 degrees Fahrenheit (177 degrees Celsius). Grease two 9-inch round cake pans thoroughly with butter or non-stick spray, then line the bottoms with parchment paper circles and grease the parchment as well. This double-insurance method ensures your cakes release cleanly every single time. Dust the pans lightly with flour and tap out any excess before setting them aside.
Step 2: Whisk Together the Dry Ingredients (3 minutes)
In a large mixing bowl, whisk together the all-purpose flour, baking powder, baking soda, and salt until everything is evenly distributed. Whisking the dry ingredients together rather than sifting saves time while still aerating the flour and ensuring the leavening is perfectly spread throughout. Set this bowl aside while you move on to creaming the butter.
Step 3: Cream the Butter and Sugar (5 minutes)
Beat the softened butter on medium-high speed for about 2 minutes until it becomes noticeably lighter in color and fluffy in texture. Add the granulated sugar and continue beating for another 3 full minutes. The mixture should look pale, creamy, and almost cloud-like when it is properly creamed. This step is what creates the air pockets that give your cake its lift and tenderness.
Step 4: Add Eggs and Extracts (3 minutes)
Add the eggs one at a time, beating well after each addition and scraping down the sides of the bowl as needed. Once all the eggs are incorporated and the batter looks smooth and glossy, mix in the pure vanilla extract and almond extract. The batter will smell absolutely incredible at this point, warm and rich and buttery all at once.
Step 5: Alternate Dry Ingredients and Buttermilk (5 minutes)
With the mixer on low speed, add the flour mixture in three additions, alternating with the buttermilk in two additions. Begin and end with the flour mixture. Mix only until each addition is just incorporated before adding the next. Overmixing at this stage will develop the gluten too much and result in a dense cake. Stop mixing the moment you no longer see streaks of flour.
Step 6: Fold In the Sprinkles (2 minutes)
Remove the bowl from the mixer and use a rubber spatula to gently fold in the rainbow jimmies sprinkles by hand. Do this with slow, sweeping motions from the bottom of the bowl upward. Fold only until the sprinkles are evenly distributed throughout the batter. Using jimmies rather than round nonpareils is important because nonpareils bleed color into the batter and turn it a muddy gray-brown during baking.

Step 7: Bake the Cakes (28 to 32 minutes)
Divide the batter evenly between your two prepared cake pans. Give each pan a gentle tap on the counter to release any large air bubbles trapped in the batter. Bake on the center rack for 28 to 32 minutes. The cakes are done when a toothpick inserted in the center comes out clean or with just a dry crumb or two attached. The tops will be a beautiful pale golden color and spring back lightly when pressed.
Step 8: Cool Completely (1 hour)
Let the cakes cool in their pans on a wire rack for exactly 15 minutes, then carefully turn them out onto the rack to cool completely. Do not rush this step. Frosting a warm cake will cause the buttercream to melt and slide off no matter how thick you apply it. Give the layers a full hour at room temperature, or speed things up by placing them in the refrigerator for 30 minutes once they have cooled down enough to handle.
Step 9: Make the Vanilla Buttercream (10 minutes)
Beat the softened butter on medium-high speed for 3 to 4 minutes until it is very pale and creamy. Reduce the speed to low and add the sifted powdered sugar one cup at a time. Once all the sugar is added, increase to medium speed and add the vanilla extract, salt, and 3 tablespoons of heavy cream. Beat on high speed for 2 full minutes. The frosting should be fluffy, bright white, and spreadable. Add the extra tablespoon of cream if needed.
Step 10: Assemble and Frost the Cake (15 minutes)
Place one cake layer on your serving plate or cake board. Spread a generous layer of buttercream across the top using an offset spatula. Place the second cake layer on top, pressing gently to secure it. Apply a thin crumb coat of frosting all over the cake and refrigerate for 15 minutes to lock in any crumbs. Then frost the top and sides with the remaining buttercream in whatever style you love, and finish with a generous shower of rainbow sprinkles.

Pro Tips for Best Results
- Room temperature ingredients are not optional here. Cold butter will not cream properly and cold eggs cause the batter to curdle. Pull everything out of the refrigerator at least 45 minutes before you start baking.
- Always spoon and level your flour rather than scooping directly from the bag. Scooping compacts the flour and can add up to 20 percent more than the recipe calls for, resulting in a dry, heavy cake.
- Use only jimmies-style sprinkles inside the batter. They hold their color and shape during baking. Reserve round nonpareils exclusively for outside decoration where they will not bleed.
- If you want perfectly even cake layers, weigh your batter on a kitchen scale and divide it exactly in half between the two pans. Level layers stack and frost so much more beautifully.
- Chill your frosted cake for 20 minutes before slicing for the cleanest, most photogenic cuts that hold their shape on the plate.
Common Mistakes to Avoid
- Using nonpareils inside the batter is the most common funfetti mistake. Those tiny round sprinkles dissolve and bleed gray or brown streaks through the batter the moment they hit moisture. Always use jimmies for the interior and save nonpareils for the outside finish.
- Overmixing after adding the flour leads to dense funfetti cake. Once the flour goes in, mix on the lowest speed possible and stop the moment the batter looks smooth. Those extra few seconds of mixing actually do matter.
- Not greasing the parchment paper is a mistake that seems small until your cake tears in half when you try to remove it. Always grease both the pan and the parchment liner for a guaranteed clean release.
- Skipping the crumb coat when frosting leads to visible crumbs mixed into your final frosting layer. Even a very thin layer chilled for just 15 minutes makes a huge difference in the final appearance.
What to Serve With / Meal Pairing Ideas
- A tall glass of cold whole milk is the most classic pairing with funfetti cake. The cool, slightly fatty milk balances the sweetness of the buttercream and complements the vanilla in a way that feels genuinely comforting and nostalgic at any celebration.
- For an adult gathering or bridal shower, a pitcher of homemade strawberry lemonade or a light prosecco works beautifully. The subtle fruity brightness cuts through the richness of the buttercream and makes each bite feel even more festive.
- A scoop of classic vanilla bean ice cream placed beside a slice of funfetti cake creates the ultimate dessert plate. The cold creamy ice cream melting into the moist cake layers is one of life’s genuinely great pleasures.

Storage and Reheating
- Store leftover funfetti cake covered at room temperature for up to 2 days if your home is not too warm.
- Refrigerate in an airtight cake container for up to 5 days. Always let refrigerated slices sit at room temperature for 15 to 20 minutes before serving so the frosting softens back to its natural texture.
- To freeze unfrosted layers, wrap each tightly in plastic wrap and then aluminum foil. They keep beautifully in the freezer for up to 3 months. Thaw overnight in the refrigerator, then bring to room temperature before frosting.
- You can also freeze frosted slices on a parchment-lined baking sheet until firm, then wrap individually and store in a freezer bag for up to 3 months.
Nutrition Information
| Nutrient | Amount Per Serving |
| Calories | 580 kcal |
| Total Fat | 28g |
| Saturated Fat | 17g |
| Cholesterol | 120mg |
| Sodium | 210mg |
| Total Carbohydrates | 79g |
| Sugars | 58g |
| Protein | 5g |
Health Benefits
Funfetti cake is absolutely a treat and best enjoyed as part of a balanced lifestyle, but it does offer a few genuine nutritional positives. Eggs provide a good source of protein and essential vitamins including B12 and choline, which support brain health. Butter contributes fat-soluble vitamins A and D, both of which play important roles in immune function and bone health.
And perhaps most importantly, sharing a slice of this cake with someone you love has real, documented emotional benefits. Joy and connection are deeply nourishing in ways that no nutrition label can fully capture.
Conclusion
Funfetti cake never needs a special reason. A quiet Tuesday afternoon, a friend who needed cheering up, a birthday you almost forgot, or just the simple fact that you had butter and sprinkles sitting on your counter. Any moment is good enough for this cake. I hope it brings as much joy to your kitchen table as it has brought to mine over the years. Bake it, share it with someone you love, and save this recipe for the next time you need a little color and sweetness in your day.